




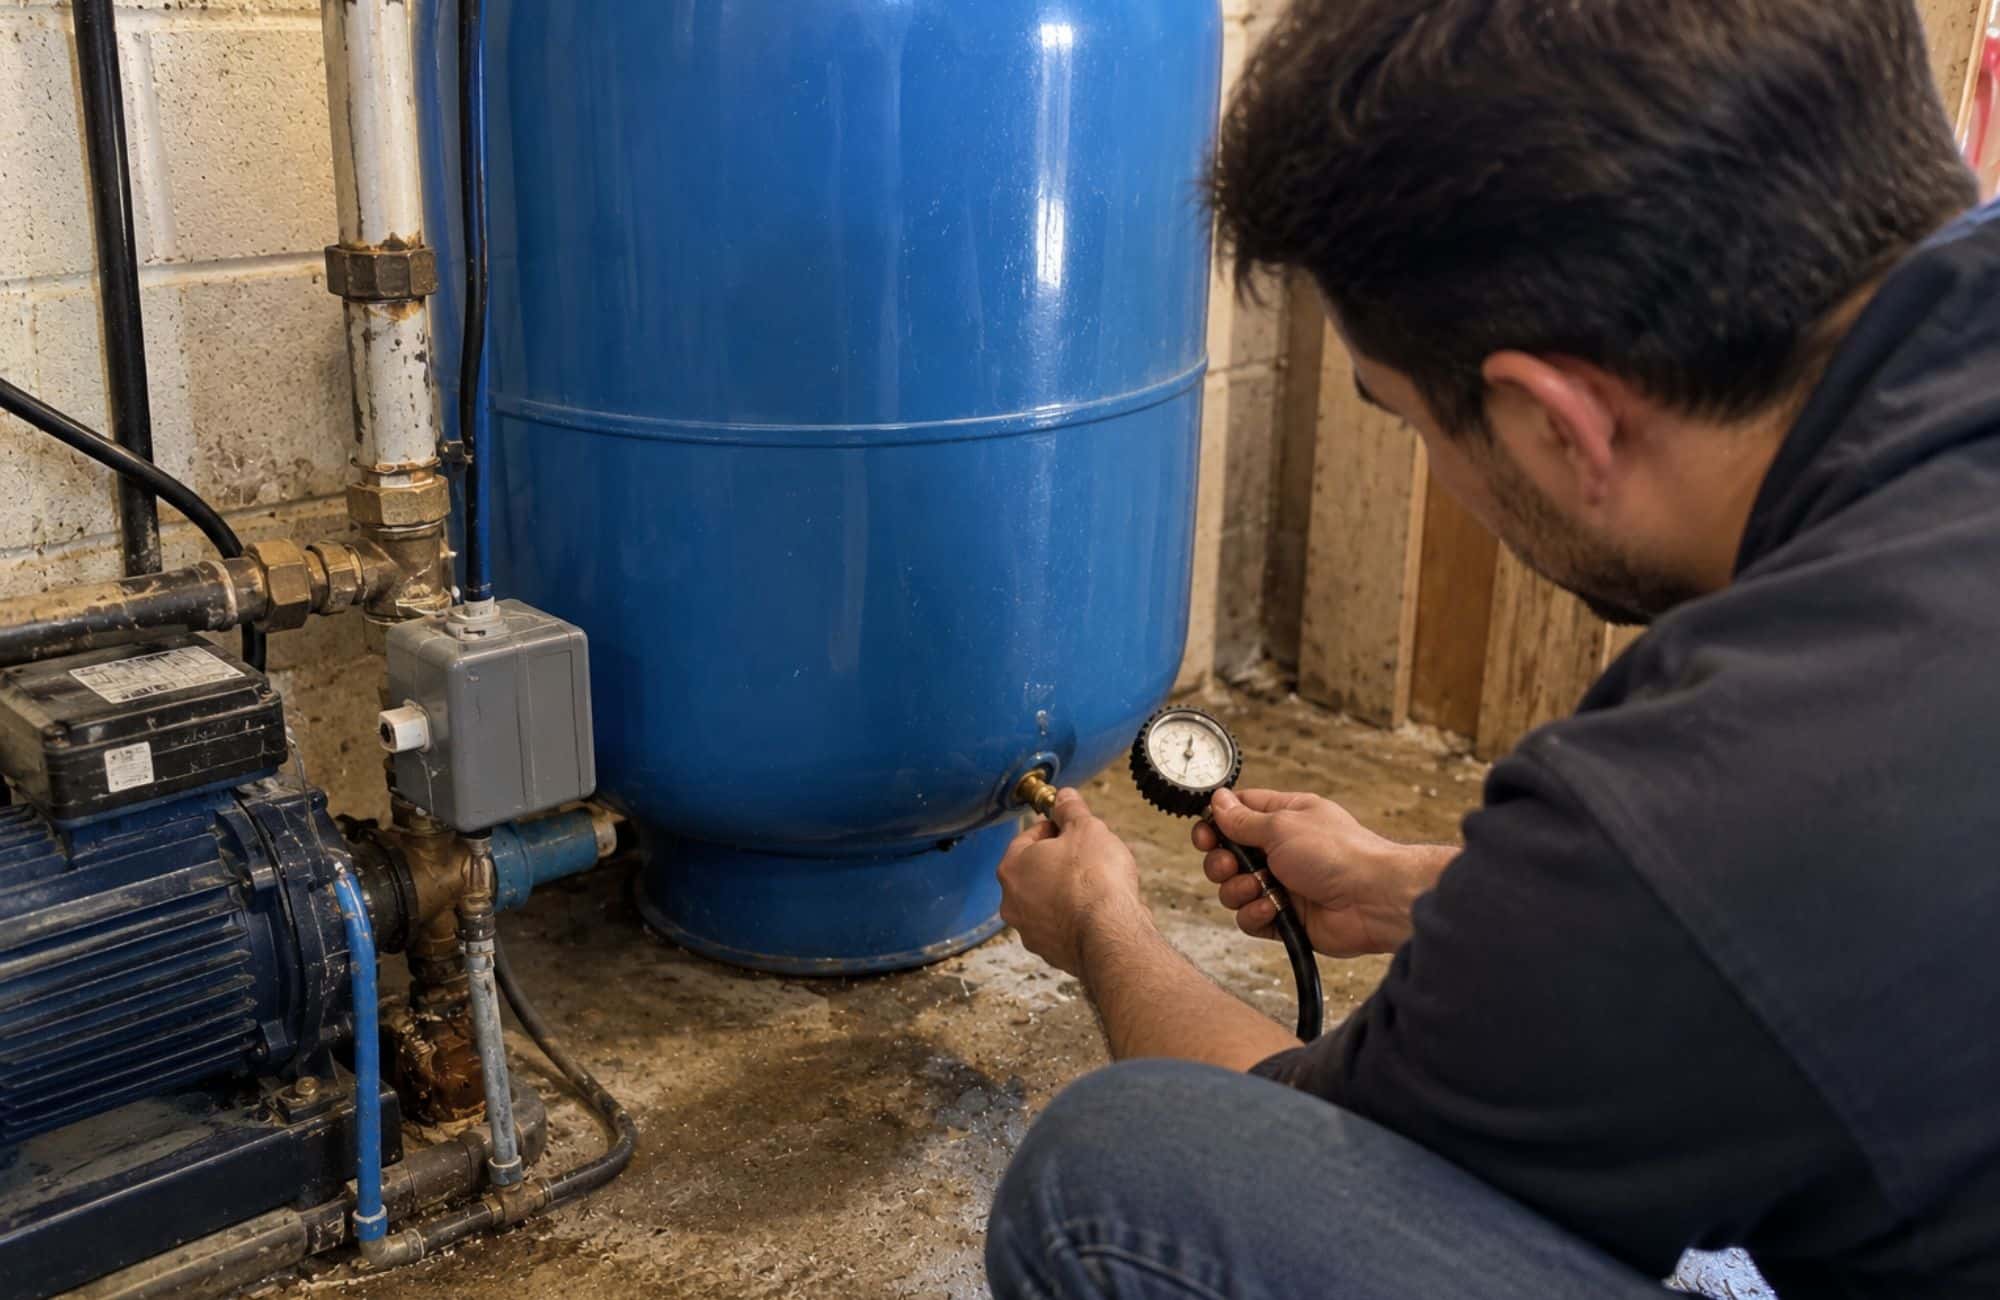
Low air pressure in a well pressure tank can cause frequent pump cycling, sudden pressure changes, and less usable water between pump starts. These bladder tank pressure too low symptoms may indicate that the tank needs an air adjustment, but they can also point to other well system problems.
For homeowners in New Milford, Connecticut, and surrounding areas, knowing how to identify low tank pressure can help prevent unnecessary pump strain. This guide explains the warning signs, how to measure and adjust air pressure correctly, and when a tank may need professional attention.
What Does Low Pressure in a Bladder Tank Mean?
Low bladder tank pressure means the compressed air inside the tank is below the recommended setting for the well water system. This air pressure, known as the pre-charge, allows the tank to store and deliver water between pump cycles. Too little air can reduce usable water storage and cause the pump to start more frequently.
A bladder pressure tank contains a flexible internal barrier separating the water from compressed air. As the well pump fills the tank, the air compresses and stores energy. When a faucet opens, the compressed air helps push stored water into the plumbing.
The pressure switch controls when the well pump starts and stops. Its cut-in pressure activates the pump, while its cut-out pressure shuts it off. The tank’s air pre-charge must match the system’s operating settings and the manufacturer’s specifications.
Why the Air Charge Matters
The compressed air acts as a cushion that helps the tank deliver water without starting the pump every time a faucet opens. When this cushion becomes too small, the tank may provide less water before the pump needs to run.
The amount of usable water between pump cycles is called drawdown. It depends on tank size, pre-charge, and pressure settings. A tank with insufficient air may have reduced drawdown even when its exterior appears normal.
What Are the Symptoms of Low Bladder Tank Pressure?
Common symptoms of low bladder tank air pressure include frequent pump cycling, rapid pressure gauge movement, noticeable water pressure changes, and reduced water delivery between pump starts. These signs suggest that the pressure tank may not be maintaining its intended air cushion. However, they do not confirm low pre-charge without testing.
The following symptoms can help you recognize when your well pressure tank needs attention.
1. The Well Pump Turns On and Off Frequently
A pump that starts and stops repeatedly during normal water use may be experiencing short cycling. Instead of providing a reasonable amount of stored water, the tank allows the pump to restart after only a small amount has been used.
Low air pre-charge can contribute to short cycling by reducing the tank’s usable drawdown. Frequent starts also place additional demands on the pump motor and electrical components. However, a damaged bladder, incorrect tank sizing, or pressure switch problem can produce similar behavior.
2. Water Pressure Changes Rapidly
Water pressure normally rises and falls between the pump’s cut-in and cut-out settings. With a conventional 30/50 psi system, the pump typically starts near 30 psi and stops near 50 psi.
A warning sign is when these changes happen unusually quickly or water delivery becomes inconsistent. The pressure gauge may climb rapidly when the pump starts and fall just as quickly when water is used. This pattern can indicate reduced tank drawdown, although other system faults may also be responsible.
3. The Tank Delivers Very Little Water
A pressure tank should provide a certain amount of stored water before the pump restarts. If the pump turns on after only a small amount of water is used, the tank may have lost part of its effective air cushion.
This symptom becomes easier to recognize when you compare current pump behavior with its normal operation. Remember that the tank’s total rated capacity is not the same as its usable water capacity. Actual drawdown depends on the tank model and operating pressure.
4. Water Flow Becomes Inconsistent
You may notice brief pressure drops while showering or using multiple fixtures. These changes can become more noticeable when the tank is not providing its expected stored-water capacity.
However, inconsistent flow is not always caused by insufficient air pressure. Clogged filters, plumbing restrictions, pump performance, and pressure switch problems can produce similar symptoms. Measuring the tank’s pre-charge is necessary before deciding whether an air adjustment will help.
How Do You Check Air Pressure in a Bladder Tank?
To check bladder tank air pressure accurately, turn off power to the well pump, drain the tank completely, and measure the pre-charge using a tire pressure gauge at the Schrader valve. Compare the reading with the manufacturer’s recommended setting and the pump’s actual cut-in pressure. Measuring a water-filled tank does not provide an accurate pre-charge reading.
The Pentair Pro-Source Pressure Tank Manual describes checking the air charge after shutting off pump power and draining the tank. Follow your specific tank’s instructions before making adjustments.
Tools Needed to Check Tank Pressure
Most accessible residential tanks can be checked using basic equipment when the system can be safely shut down and drained. Gather the required tools before starting so the tank does not need to remain depressurized longer than necessary.
You will need:
- An accurate tire pressure gauge
- Access to the tank’s Schrader air valve
- The tank manufacturer’s pressure specifications
- Access to the pump’s electrical disconnect or circuit breaker
- A suitable faucet or tank drain valve
- A way to record the pressure reading
The Schrader valve resembles an ordinary tire valve and is commonly located near the top of the tank. Its position may vary depending on the manufacturer and tank design.
Step 1: Identify the Tank’s Required Pressure
Check the tank label and manufacturer’s instructions to determine the correct air pre-charge. You will also need to know the pump’s actual cut-in pressure, which may differ from the pressure switch’s original label.
If the operating setting is unknown, a qualified technician can verify it. Do not open the electrical pressure switch or adjust its settings merely to perform an air-pressure check.
Step 2: Turn Off the Well Pump
Switch off electrical power using the designated pump disconnect or circuit breaker. This prevents the pump from restarting while the tank is being drained.
Keep the electrical controls closed and avoid exposed wiring. If you cannot identify the correct disconnect, leave the test to a qualified professional.
Step 3: Drain the Pressure Tank
Open a suitable faucet or drain valve and allow water to leave the pressure system. The plumbing pressure gauge should fall to zero as the system depressurizes.
Follow the manufacturer’s instructions to confirm the tank is fully drained, and keep the appropriate drain open during testing. If water remains trapped or the tank will not drain normally, stop and investigate the problem before proceeding.
Step 4: Measure the Air Pre-Charge
Remove the protective cap from the Schrader valve and place the tire pressure gauge firmly against it. Record the reading without unnecessarily releasing air.
For example, a conventional 30/50 psi system following the common 2-psi rule requires 28 psi of air pre-charge. If its fully drained tank reads only 20 psi, the air charge is below the required setting. That measurement identifies low pre-charge but does not explain why the air was lost.
Step 5: Check for Visible Problems
Inspect accessible tank surfaces, fittings, and the air valve for moisture, corrosion, or visible damage. Do not loosen fittings or dismantle tank components.
If water emerges from the Schrader valve, the internal bladder or diaphragm may be damaged. Stop the adjustment process and arrange an inspection rather than adding more air.
What Is the Correct Air Pressure for a Bladder Tank?
The correct bladder tank air pressure depends on the pump’s cut-in setting and the tank manufacturer’s instructions. Many conventional pressure tanks require a pre-charge approximately 2 psi below the pump’s cut-in pressure, measured with the tank completely drained. Other tank models and constant-pressure systems may require different settings.
For example, Amtrol’s well tank support guidance specifies a pre-charge 2 psi below the pressure switch’s cut-in setting for its well tanks. This is a common rule, but it should not replace the instructions for your installed equipment.
Common Bladder Tank Pressure Settings
The following table shows typical pre-charge examples for conventional systems that follow the 2-psi-below-cut-in rule. These values apply to the tank’s air pressure when it contains no water.
| Pressure switch setting | Pump cut-in | Tank pre-charge |
| 20/40 psi | 20 psi | 18 psi |
| 30/50 psi | 30 psi | 28 psi |
| 40/60 psi | 40 psi | 38 psi |
A tank may arrive with a factory pre-charge of 38 psi, but that does not make 38 psi correct for every installation. Some manufacturers specify a different offset, and variable-speed systems may use a completely different calculation.
What Happens if the Air Pressure Is Too High?
Excessive pre-charge can cause problems just as insufficient air pressure can. When the tank’s air pressure is set too high relative to pump cut-in, stored water may run out before the pump starts.
This can create a noticeable interruption in water delivery. Adding air beyond the recommended setting will not automatically increase household water pressure, so always use the specified pre-charge rather than guessing.
Why Does a Bladder Tank Lose Air Pressure?
A bladder tank may lose air through a leaking Schrader valve, damaged internal bladder, or another defect in the tank’s air-holding components. An incorrect initial setting can also leave the tank with insufficient pre-charge even when no leak exists. Identifying the cause helps determine whether adjustment, component repair, or tank replacement is appropriate.
Some causes can be corrected without replacing the tank, while others require a more detailed inspection.
Leaking Schrader Valve
The Schrader valve allows air to be added or released during pressure adjustments. A damaged valve core or poor seal may allow compressed air to escape gradually.
A suitable soap solution can sometimes reveal an external air leak through repeated bubbling around the valve. Any repair should follow the manufacturer’s instructions, and pressurized components should never be dismantled without proper isolation and depressurization.
Damaged Internal Bladder
The internal bladder or diaphragm separates compressed air from water. If it tears or ruptures, the tank may lose its ability to maintain normal separation and usable water storage.
Water coming from the air valve is a strong warning sign of internal damage on many bladder-style tanks. Adding more air will not repair a torn internal barrier.
Aging, Corrosion, or Physical Damage
Over time, tank components may deteriorate because of service conditions, moisture, corrosion, or physical damage. Exterior rust and leaking fittings deserve attention because the tank operates under pressure.
A corroded or structurally damaged tank should not be patched or repeatedly recharged. A qualified professional should determine whether it is safe to remain in service.
Incorrect Initial Pre-Charge
A tank may have been installed without adjusting its factory air pressure to match the pump controls. Changes to the pressure switch can also leave an otherwise functional tank with the wrong setting.
This does not necessarily mean the bladder has failed. The proper correction depends on verifying the operating pressure and adjusting the tank according to its specifications.
How Do You Fix Low Air Pressure in a Bladder Tank?
Low air pressure in a sound bladder tank may be corrected by adjusting its pre-charge to the manufacturer’s recommended setting. The pump must be turned off, the tank fully drained, and the correct pressure confirmed before adding air. If the tank has structural damage, a leaking bladder, or recurring air loss, an adjustment alone may not resolve the problem.
Once you have completed the pressure-checking procedure described above, the actual adjustment involves adding air carefully and confirming that the tank operates normally afterward.
Step 1: Confirm the Correct Pre-Charge
Use the tank manufacturer’s required setting and the pump’s verified cut-in pressure. For a conventional 30/50 psi system following the 2-psi rule, the target would be 28 psi.
Do not assume every system uses this setting. Constant-pressure systems and certain tank designs may require different values.
Step 2: Add Air Through the Schrader Valve
With pump power off and the tank fully drained, attach an appropriate air pump or carefully controlled compressor to the Schrader valve. Add air gradually while checking the pressure frequently.
Stop when the gauge reaches the manufacturer’s specified pre-charge. Do not exceed the tank’s rated limits, and stop immediately if the tank shows leakage or other signs of damage.
Step 3: Recheck the Pressure
Measure the air pressure again while the tank remains drained. If the reading is too high, follow the manufacturer’s procedure for carefully releasing excess air.
Once the pressure is correct, replace the Schrader valve cap securely. If the tank cannot retain its air charge, inspect for possible leakage rather than repeatedly adding more air.
Step 4: Restore the Water System
Close the drain valve, restore pump power, and allow the system to refill. Observe the plumbing pressure gauge as the pump approaches its normal shutoff pressure.
Open a faucet and watch how pressure changes as water is used. The pump should operate within its normal pressure range without repeated rapid starts or unexpected interruptions.
Step 5: Check Whether the Adjustment Worked
A successful adjustment should restore the intended pre-charge and support normal tank operation. However, proper cycling also depends on tank sizing, pump performance, and pressure switch settings.
If short cycling continues or the tank quickly loses air again, the original problem may not be limited to low pre-charge. Further testing is needed before deciding whether to repair or replace equipment.
Low Air Pressure vs. a Failed Bladder: What’s the Difference?
Low air pressure and a failed bladder are different conditions, even though they may cause similar symptoms. A tank with an intact bladder may simply need its air charge corrected. A ruptured bladder can prevent the tank from maintaining its intended air-water separation and may require replacement.
The following comparison helps identify which problems deserve further investigation. It should not replace the manufacturer’s testing procedure or a professional diagnosis.
How to Tell the Problems Apart
| Observation | Possible cause | Recommended action |
| Low pre-charge with no visible damage | Air loss or incorrect setting | Adjust and retest |
| Repeated air pressure loss | Leaking valve or internal defect | Check for leakage |
| Water comes from the air valve | Possible bladder or diaphragm rupture | Arrange professional inspection |
| Short cycling continues after adjustment | Tank or other system fault | Test pump controls and tank |
| Visible corrosion or shell leakage | Possible pressure vessel damage | Stop using damaged equipment |
A tank with too little effective air cushion may be described as waterlogged. However, waterlogging does not automatically confirm a ruptured bladder. Lost air charge and internal failure can both affect the tank’s ability to deliver stored water.
Can a Waterlogged Tank Be Repaired?
Whether repair is possible depends on what failed. A structurally sound tank with low pre-charge may only need an air adjustment or repair of a serviceable valve component.
A ruptured bladder often requires replacing the complete residential tank, although some models have replaceable internal air cells. The tank’s design and condition determine whether repair is practical, especially when considering how a bad bladder tank can cause low water pressure.
What If Adjusting the Air Pressure Does Not Fix the Problem?
If pressure problems continue after correctly adjusting the tank’s air charge, another part of the well water system may be responsible. The pressure switch, gauge, plumbing, well pump, or tank sizing may need evaluation. Repeatedly adding air without identifying the cause can delay the necessary repair.
The next step should focus on the remaining symptoms and how the system behaves while the pump is running or water is being used.
Pressure Switch or Gauge Problems
The pressure switch controls pump startup and shutdown. A malfunctioning switch or blocked sensing connection can cause improper cycling, even when the tank has the correct pre-charge.
An inaccurate pressure gauge can also make normal operation appear abnormal. Electrical testing and pressure switch repairs should be handled by a qualified professional.
Water Leaks or Check Valve Problems
A pressure gauge that drops while all fixtures are closed may indicate an unintended loss of water pressure. Possible causes include plumbing leaks, underground water line problems, or a faulty check valve.
Low tank air pressure alone does not explain every pressure drop when no water is being used. Proper testing can help identify whether water is escaping from the system.
Well Pump or System Sizing Problems
A pump that struggles to build pressure or runs continuously may have a problem unrelated to the pressure tank. Pump wear, low well yield, plumbing restrictions, or electrical problems can affect water delivery.
Tank sizing also matters because an undersized tank may provide inadequate drawdown even with the correct air charge. A professional evaluation through well pressure tank services can help determine whether the problem involves tank capacity, operating settings, or equipment that needs repair.
How Can You Prevent Low Bladder Tank Air Pressure?
Periodic pressure checks and routine tank inspections can help identify air loss before it becomes a larger problem. Following the manufacturer’s maintenance schedule allows you to recognize changes in pump cycling, tank performance, and air pressure. Accurate records are especially useful when the same issue returns after an adjustment.
Some manufacturers recommend regular professional inspection of the complete pressure system. Maintenance frequency should reflect the tank’s model, age, condition, and operating history.
Practical Pressure Tank Maintenance
A basic maintenance record can make changes easier to recognize. When comparing air-pressure readings, make sure each measurement is taken with the pump off and the tank drained.
Useful maintenance practices include:
- Record the tank model and recommended pre-charge.
- Keep a record of verified pressure switch settings.
- Check accessible fittings and tank surfaces for leaks or corrosion.
- Keep the Schrader valve cap secured.
- Watch for frequent pump cycling or reduced drawdown.
- Investigate recurring air loss instead of repeatedly adding air.
- Follow the tank manufacturer’s inspection schedule.
Avoid changing pressure switch settings simply to compensate for poor tank performance. Increasing operating pressure without evaluating the pump and plumbing can create additional system problems.
Get Help With Low Bladder Tank Pressure
Low bladder tank pressure may be corrected with a proper air adjustment, but repeated air loss, frequent pump cycling, or visible tank damage may require professional inspection. Identifying the underlying cause helps determine whether the tank needs adjustment, repair, or replacement.
Housatonic Valley Well Pump Services LLC helps homeowners in New Milford, Connecticut, and surrounding areas diagnose pressure tank problems. If your bladder tank continues losing air or your pump cycles abnormally, contact us to schedule an inspection.
FAQs
How Do I Know if My Pressure Tank Needs Air?
Frequent pump cycling and reduced water storage may indicate low air pressure. The most reliable way to confirm it is to check the tank’s air pre-charge while it is fully drained.
How Do You Increase Bladder Tank Pressure?
Turn off the well pump, drain the tank, and add air through the Schrader valve. Adjust the pressure according to the manufacturer’s recommended pre-charge.
How Can I Tell if the Bladder in My Pressure Tank Is Bad?
Water coming from the tank’s air valve is a strong sign of internal bladder damage. Frequent cycling alone cannot confirm bladder failure, so further inspection may be needed.
Is 20 PSI Too Low for a Bladder Tank?
It depends on your pressure switch settings and tank specifications. For a conventional 30/50 psi system requiring a 28 psi pre-charge, 20 psi is too low.
Can I Add Air to My Pressure Tank Without Draining It?
The tank should be fully drained before checking or adjusting its air pre-charge. Water inside the tank can interfere with an accurate reading.
How Often Should I Check My Well Pressure Tank’s Air Charge?
Follow the manufacturer’s maintenance schedule and check sooner if pump cycling becomes abnormal. Regular inspections can help identify recurring air loss.