


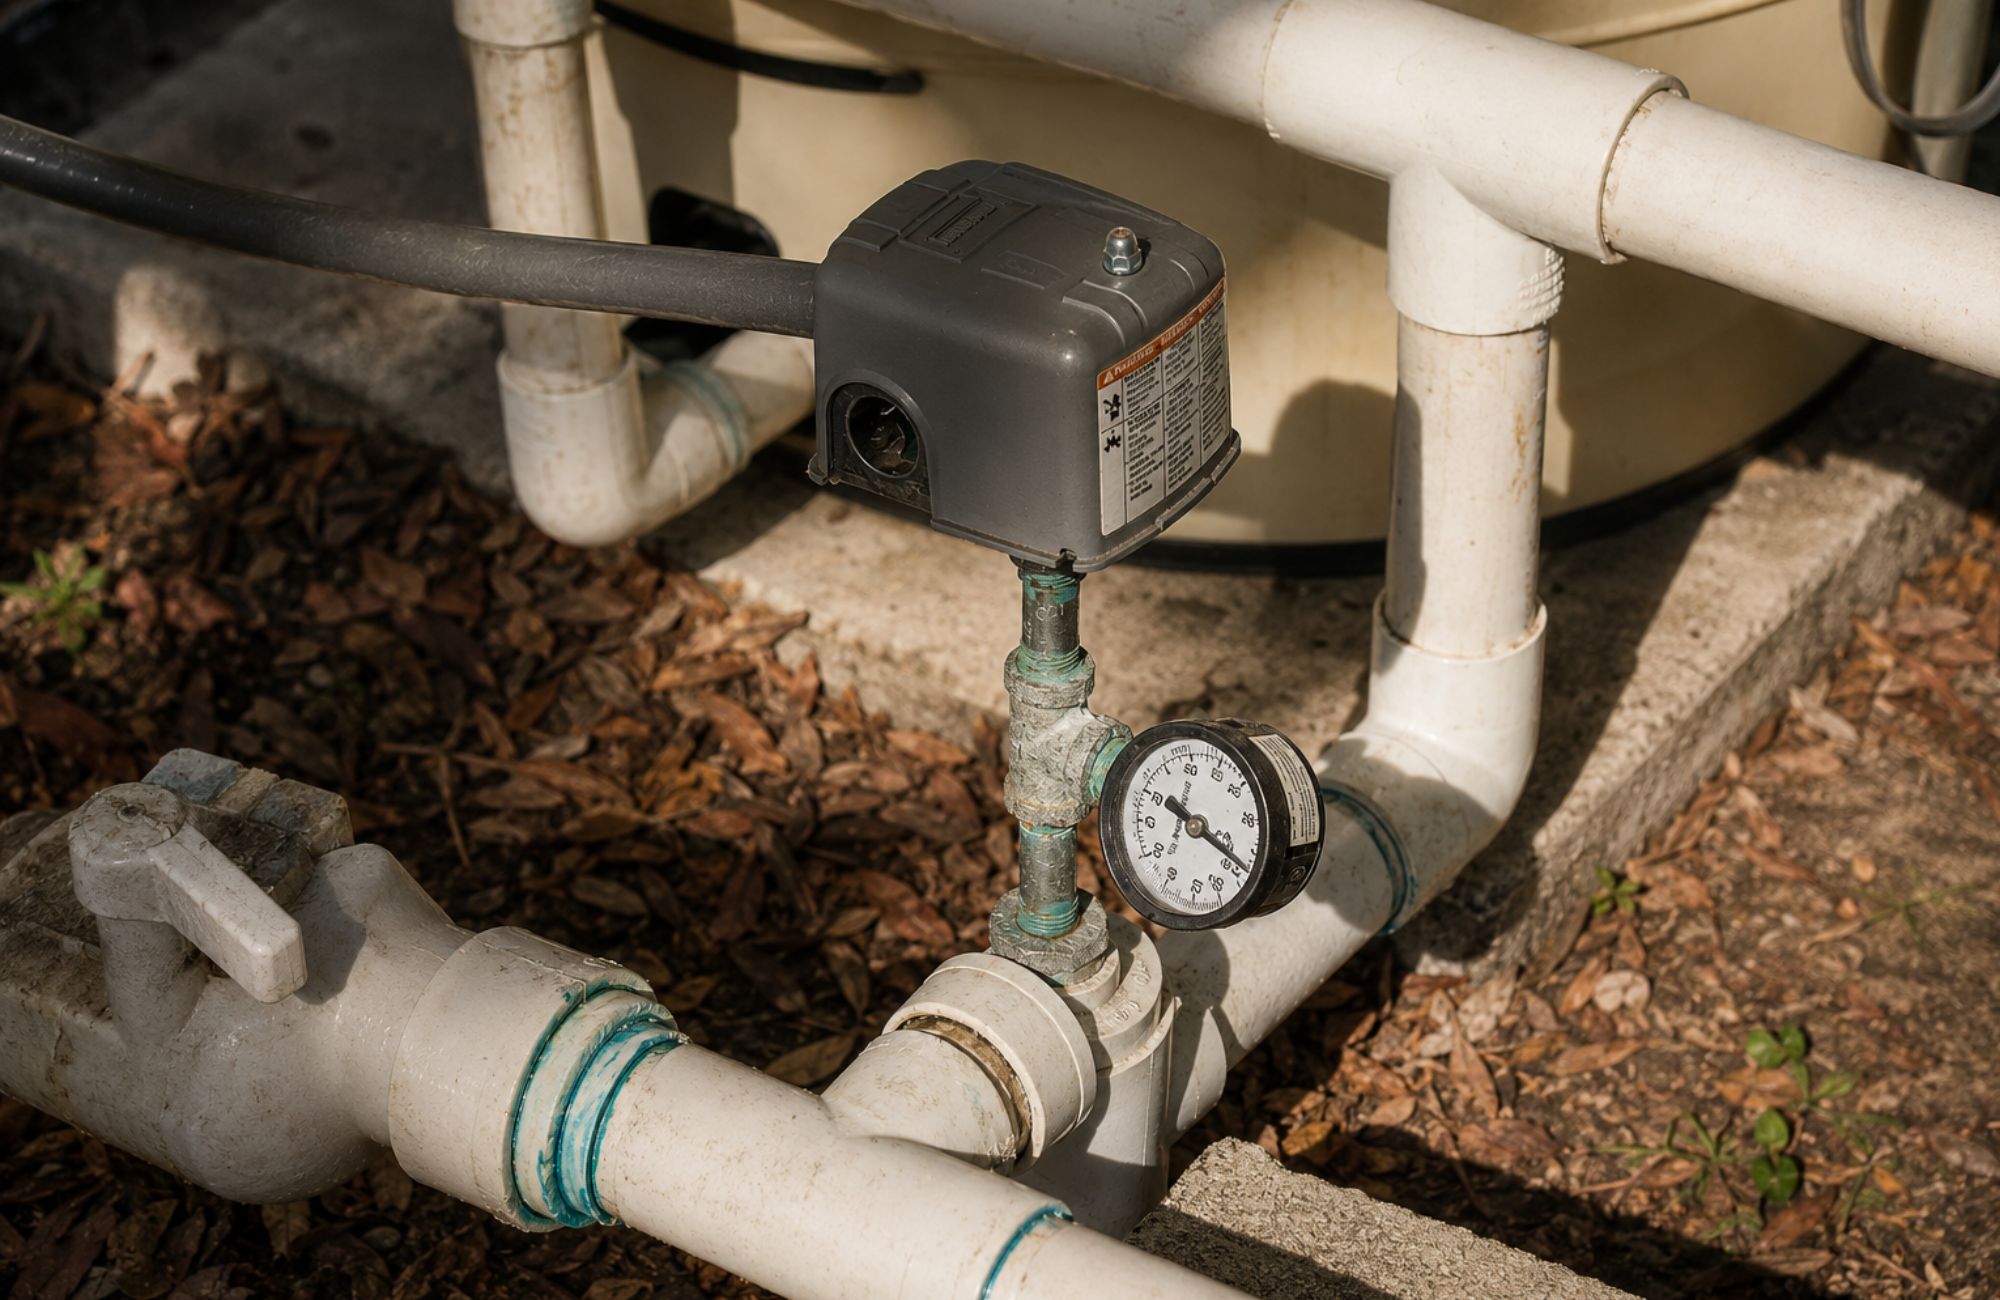
A 40 60 pressure switch setting tells a private well pump to start when water pressure falls to about 40 pounds per square inch and stop when it reaches about 60 PSI. This pressure range can provide stronger pressure than a 30/50 setting, but the pump, tank, gauge, plumbing, and controls must all support it.
Changing the switch without checking the rest of the well system may cause short cycling, continuous pump operation, unstable pressure, or added strain on older components. Before raising the setting, have the system evaluated if you are unsure whether the pump can reach 60 PSI safely.
What Does a 40 60 Pressure Switch Setting Mean?
A 40 60 pressure switch setting means the well pump starts near 40 PSI and stops near 60 PSI. The lower number is the cut-in pressure, while the higher number is the cut-out pressure. The 20-PSI difference between them is called the pressure differential.
A pressure switch reacts to changes in the water pressure near the pressure tank. When household water use lowers system pressure to the cut-in point, the switch closes its electrical contacts and starts the pump. The pump then adds water to the tank and plumbing system until pressure reaches the cut-out point.
A 40/60 setting does not mean water pressure stays at exactly 40 or 60 PSI. Pressure normally moves between those two points as the pump cycles. Actual readings may also vary slightly because of gauge accuracy, switch condition, temperature, system design, and normal manufacturing variation. Boshart notes that a labeled switch may operate a few PSI away from its stated settings.
The terms below describe the basic operating cycle. Understanding them makes it easier to recognize whether a pressure problem comes from the switch or another system component.
| Term | What it means |
| Cut-in pressure | The pressure at which the switch starts the pump |
| Cut-out pressure | The pressure at which the switch stops the pump |
| Differential | The difference between cut-in and cut-out |
| Pump cycle | One complete start, run, and stop sequence |
| Tank pre-charge | Air pressure inside an empty bladder or diaphragm tank |
For a standard 40/60 setup, the nominal differential is 20 PSI. Pentair’s instructions for covered one-post and two-post switches maintain this 20-PSI difference when the main adjustment nut is changed.
What Should the Pressure Tank Pre-Charge Be for 40/60?
Many bladder and diaphragm tanks use a 38-PSI pre-charge with a 40/60 switch because the air pressure is set 2 PSI below the 40-PSI cut-in point. The tank must be empty of water when tested. However, the correct difference depends on the tank and switch instructions.
Tank pre-charge is measured at the air valve, often called a Schrader valve, near the top of the pressure tank. It cannot be checked correctly while the tank still contains pressurized water. The pump must be off, the tank must be drained, and the water-pressure gauge must read zero before the air reading is taken.
Pentair’s pressure-switch chart pairs a 40-PSI cut-in with a 38-PSI tank pre-charge. Amtrol also specifies a pre-charge 2 PSI below cut-in for its Well-X-Trol tanks and gives 38 PSI as the example for a 40/60 system.
Why 38 PSI is common but not universal
The familiar 38-PSI figure applies when the tank manufacturer calls for a 2-PSI difference. Some products use a wider gap. For example, a Pentair Pro-Source composite-tank manual calls for pre-charge 4 PSI below cut-in and allows an even wider difference for certain high-flow, high-pressure, or high-temperature applications.
Boshart also recommends a wider gap in some low-pressure cut-out applications to reduce nuisance shutdowns. This is why a homeowner should not assume every 40/60 system needs exactly 38 PSI. The tank label, switch instructions, and system design should guide the final setting.
What happens when pre-charge is wrong?
Pre-charge that is too close to cut-in may let water flow fall off just before the pump starts. On a low-pressure cut-out switch, it can also contribute to nuisance shutdowns. Pre-charge that is too low reduces useful tank drawdown and may cause the pump to start more often.
The effects depend on the tank design and severity of the mismatch. Possible signs include:
- The pump starts after only a small amount of water use.
- Pressure drops sharply just before the pump starts.
- Water flow briefly stops between cycles.
- The switch clicks more often than expected.
- The pump short-cycles during normal household use.
- The tank holds little usable water between pump starts.
Do not keep adding air based only on a quick tire-gauge reading while the system is pressurized. Drain the tank first and compare the result with the instructions for that tank.
Is a 40/60 Setting Right for Your Well System?
A 40/60 setting can work well when the pump reaches 60 PSI without struggling and every tank, pipe, valve, filter, fixture, and control supports the pressure range. Higher settings are not suitable for every well. Pump capacity, well depth, plumbing condition, and household demand must be considered first.
The main question is whether the pump can reach cut-out and stop normally. If a weak or undersized pump tops out below 60 PSI, raising the pressure switch may cause it to run continuously. The same problem can occur when a leak, clogged filter, low-yield well, worn pump, or restricted pipe prevents pressure from building.
Pentair states that cut-out should remain at least 5 PSI below the pump’s dead-head pressure for the switches covered by its instructions. Dead-head pressure is the maximum pressure produced when the pump moves no water. Because the related test involves closing the discharge and carries an explosion risk, homeowners should not perform it without the training and equipment required for pump testing.
Check the complete system, not just the switch
The switch only tells the pump when to start and stop. It does not increase the pump’s horsepower, the well’s yield, or the size of the plumbing. Raising the setting may change the pressure range, but it cannot create water the well or pump cannot supply.
Before changing from a lower setting to 40/60, the following parts should be reviewed together. A problem in any one of them may make adjustment ineffective or unsafe.
- Pump capacity: The pump must build pressure beyond the planned cut-out with a suitable operating margin.
- Pressure tank: The tank must be in good condition, properly sized, and charged for the new cut-in setting.
- Pressure gauge: An inaccurate or clogged gauge can make correct adjustment impossible.
- Plumbing: Pipes, fittings, valves, fixtures, and appliances must support the intended pressure.
- Water treatment: Filters, softeners, and treatment tanks may create pressure loss when clogged or undersized.
- Well performance: Low yield or changing water levels may limit the pump during heavy demand.
- Electrical supply: Voltage, wiring, control-box components, and motor load should be checked when the pump struggles.
- Leaks: A plumbing, underground-line, or well-component leak may keep the system from reaching cut-out.
Schedule system testing before raising the setting when the pump already runs for long periods, household pressure has recently changed, or the gauge never reaches the current cut-out point.
Pressure is not the same as flow
Pressure describes the force pushing water through the system. Flow describes how much water moves in a given amount of time. A gauge can show 60 PSI while a clogged filter, narrow pipe, partly closed valve, or weak pump still limits flow at a shower.
Changing to 40/60 may make pressure feel stronger when the system has enough capacity. It will not correct every low-flow problem. The cause of poor performance should be found before the switch is used as a workaround.
Elevation and distant fixtures
Pressure falls as water moves upward, so upper-floor fixtures may receive less pressure than equipment located near the tank. Long pipe runs and small pipe diameters can add more loss. Water-treatment equipment may reduce delivered pressure further, especially when filters are loaded with sediment.
These losses may make 40/60 attractive in a two-story home, but the complete system still has to support the higher range. Raising pressure without checking the pump and plumbing can trade one performance problem for another.
Is a 30/50 or 40/60 Pressure Switch Better?
Neither pressure range is better for every home. A 40/60 switch provides a higher operating range, while a 30/50 switch places a lower pressure demand on the pump and plumbing. The right choice depends on pump performance, tank setup, treatment equipment, elevation, household preferences, and equipment ratings.
A homeowner may prefer 40/60 when pressure at distant or upper-floor fixtures feels weak. A lower 30/50 setting may fit an older system, a smaller jet pump, or equipment that cannot reach 60 PSI with enough margin.
The comparison below shows the practical differences. It assumes both systems are correctly sized and working as designed.
| Factor | 30/50 setting | 40/60 setting |
| Pump starts | Near 30 PSI | Near 40 PSI |
| Pump stops | Near 50 PSI | Near 60 PSI |
| Common 2-PSI-rule pre-charge | 28 PSI | 38 PSI |
| Fixture pressure | Lower operating range | Higher operating range |
| Pump requirement | Lower pressure demand | Pump must reliably reach 60 PSI |
| Best fit | Systems designed for lower pressure | Systems designed for the higher range |
| Main concern | Pressure may feel low at distant fixtures | Higher setting may expose weak pumps or plumbing faults |
A 40/60 switch does not automatically increase pump life or reduce cycling. Cycle frequency depends on tank drawdown, tank size, water demand, leaks, pre-charge, and pump capacity. A properly matched 30/50 system may operate better than a poorly matched 40/60 system.
Can You Adjust a 40/60 Pressure Switch?
Many mechanical 40/60 pressure switches can be adjusted, but some models have different limits or are not intended for field adjustment. The switch must be identified before work begins. Power must be disconnected and verified off because removing the cover exposes electrical terminals that may carry hazardous voltage.
Pentair instructs users to disconnect power before working on either the pressure switch or motor. Boshart also recommends recording the original nut position before making a change so the starting point can be restored if needed.
A pressure switch should not be adjusted to hide symptoms such as continuous running, short cycling, weak flow, chattering contacts, or failure to reach cut-out. These signs may come from a pressure-tank fault, clogged sensing passage, weak pump, leak, damaged switch, or inaccurate gauge.
What do the large and small nuts control?
Many two-post mechanical switches have one larger spring and one smaller spring. The larger range adjustment normally moves cut-in and cut-out together while keeping a similar differential. The smaller adjustment changes the differential by moving the cut-out point separately.
That layout is common, but it is not universal. The correct nut, direction, pressure limit, and change per turn must come from the switch label or manufacturer manual. Pentair lists 2.5 PSI per full turn for the specific switches in its instructions, while the Local Water Well Pros article gives about 1.5 PSI per turn for the equipment discussed there. This difference shows why one universal turn count should not be used.
Pentair advises against adjusting the second nut on the models covered by its manual because few applications need a separate differential change. Boshart similarly recommends adjusting the main range first and treating differential adjustment as a secondary step.
What does a safe adjustment process include?
The exact steps depend on the switch, tank, and pump. Adjustment should begin with diagnosis rather than immediately tightening a spring.
A qualified adjustment process usually follows this order:
- Record the current cut-in and cut-out over more than one complete pump cycle.
- Confirm that the pressure gauge responds smoothly and returns to zero when drained.
- Disconnect power and verify that the switch is not energized.
- Drain the pressure tank and check its air pre-charge.
- Identify the switch model, pressure limits, and adjustment directions.
- Check whether the pump and plumbing can support the target cut-out.
- Make a small adjustment following the product instructions.
- Restore power and observe several complete pump cycles.
- Recheck cut-in, cut-out, tank operation, and pump run time.
- Stop if the pump cannot reach cut-out or any electrical problem appears.
Boshart advises monitoring the next cut-in and cut-out readings after adjustment, then watching additional cycles before deciding that the setting is correct.
Do not adjust a pressure switch with the power on. Do not touch terminals, bypass the switch, or perform a dead-head test unless you have the electrical and pump-system training required for that work.
Common Problems With a 40/60 Pressure Switch Setting
Problems blamed on a 40/60 switch often come from another part of the system. Short cycling may begin at the pressure tank, while continuous running can point to pump capacity, leaks, restrictions, or incorrect settings. Chattering and unstable readings may involve the switch, gauge, sensing port, or electrical connections.
The timing of each symptom provides useful clues, but it does not confirm the failed part. Testing should compare switch operation with tank pressure, pump performance, water demand, and electrical conditions.
The table below groups common symptoms with possible causes. Use it to describe what is happening rather than to diagnose the system from one sign.
| Symptom | Possible causes | Recommended response |
| Pump cycles every few seconds | Low pre-charge, waterlogged tank, damaged bladder, small tank, leak, or clogged sensing port | Test the tank and switch together |
| Pump reaches 60 PSI but does not stop | Stuck or damaged switch, clogged sensing passage, inaccurate gauge, or wiring problem | Turn off power and inspect professionally |
| Pump never reaches 60 PSI | Weak pump, low well yield, leak, restriction, low voltage, or setting above pump capability | Do not raise the cut-out further |
| Pressure falls to zero before pump starts | Pre-charge too close to cut-in, low-pressure cut-out issue, or switch variation | Drain and check pre-charge against the manual |
| Switch chatters | Rapid pressure change, clogged port, poor connection, damaged contacts, or tank problem | Leave power off if electrical damage is visible |
| Pressure drops quickly after shutdown | Plumbing leak, check-valve problem, tank issue, or underground leak | Perform pressure and leak testing |
| Gauge does not move smoothly | Failed gauge or blocked gauge connection | Replace or test the gauge before adjustment |
| Pressure is good near the tank but weak upstairs | Elevation, pipe restriction, filter loss, or high simultaneous demand | Check flow and pressure loss through the house |
Short cycling
Short cycling occurs when the pump starts and stops too frequently. A failing pressure switch can contribute, but the pressure tank is often part of the problem. Low air charge, a failed bladder, reduced tank drawdown, a leak, or a tank that is too small can all shorten the cycle.
Repeated starts add wear to the pump motor and electrical controls. Adjusting the small differential nut is not the first response. The tank and switch should be tested under the same operating conditions.
Continuous pump operation
A pump that keeps running may be unable to reach the 60-PSI cut-out. That can happen because of pump wear, low well yield, a leak, a restriction, low voltage, or an unrealistic pressure setting. Welded switch contacts are another possibility, but continuous running alone does not prove the contacts have failed.
Turn off power when the pump runs without reaching cut-out or when the pressure rises beyond the intended setting. Continued operation may overheat the motor or worsen an existing fault.
Chattering or inconsistent switch action
A switch may chatter when pressure changes rapidly around its operating point. The cause may be a clogged pressure-sensing nipple, poor tank performance, loose wiring, worn contacts, or an unstable pressure source.
Mineral buildup can also block the small passage that lets the switch sense system pressure. Replacing or adjusting the switch without inspecting that passage may leave the original problem in place.
Weak pressure at household fixtures
Low pressure at a distant shower does not always mean the switch needs a higher setting. A clogged sediment filter, softener problem, restricted valve, corroded pipe, small supply line, or high simultaneous demand may reduce flow after the pressure tank.
Check pressure before and after treatment equipment when practical. This can show whether the loss occurs in the well system or farther inside the house.
Arrange a full system inspection when symptoms continue after the tank pre-charge and gauge have been checked. A pressure adjustment should follow the diagnosis, not replace it.
Should You Adjust or Replace the Pressure Switch?
Adjustment makes sense when the switch is in good condition, operates consistently, and only needs a small change that the pump and tank can support. Replacement or further testing is more appropriate when contacts are damaged, readings vary sharply, the enclosure is wet, or the pump cannot reach cut-out.
The age of the switch by itself does not confirm failure. Cycle frequency, electrical load, moisture, corrosion, sediment, wiring condition, and pump behavior all affect how the switch operates.
Adjustment may be reasonable when:
- The switch responds consistently over several cycles.
- Contacts and wiring show no heat or moisture damage.
- The pressure gauge is accurate.
- The pump reaches the planned cut-out normally.
- The tank pre-charge can be matched to the new cut-in.
- The desired setting falls within the switch instructions.
Replacement or professional testing is more appropriate when the switch chatters, sticks, sparks excessively, shows burned contacts, has a damaged enclosure, or operates at inconsistent pressures. A new switch will not fix a weak pump, failed tank, leak, blocked sensing port, damaged cable, or control-box problem.
How Can You Keep a 40/60 System Working Properly?
Stable 40/60 operation depends on more than the switch. The pressure tank must hold the correct air charge, the gauge must read accurately, and the pump must reach cut-out without excessive run time. Leaks, restrictions, corrosion, and electrical damage should be corrected before they affect pump cycling.
Tank pre-charge should be checked only with the pump off and the tank empty. Amtrol recommends having the complete system checked yearly and more often as equipment ages.
Routine checks should include:
- Watching several full pump cycles for changes in start and stop pressure
- Checking for leaks around the tank tee, valves, fittings, and nearby piping
- Listening for chattering, humming, or unusually frequent pump starts
- Inspecting the switch enclosure for moisture, corrosion, or heat damage
- Confirming that the pressure gauge moves smoothly
- Servicing clogged filters and treatment equipment
- Testing tank pre-charge according to the tank instructions
Regular checks cannot prevent every failure, but they can reveal changes before the pump loses pressure or stops supplying water.
Frequently Asked Questions
These questions cover the most common concerns about 40/60 pressure switches, tank air pressure, system selection, and pump cycling. The correct answer may vary by equipment because switches and tanks do not all use the same adjustment limits. Manufacturer instructions and actual system testing take priority over a universal setting.
Can you adjust a 40-60 pressure switch?
Many mechanical 40/60 pressure switches can be adjusted, but the permitted range and method depend on the model. The main adjustment commonly changes cut-in and cut-out together, while a second adjustment may change the differential. Disconnect and verify power before opening the switch, and confirm that the pump can reach the new cut-out before raising the setting.
Is a 30/50 or 40-60 pressure switch better?
A 40/60 setting offers a higher operating pressure range, but it is not better for every well. A 30/50 setting may fit a smaller or weaker pump and places less pressure demand on the system. The right choice depends on pump capacity, tank setup, elevation, plumbing, water treatment, and desired fixture performance.
What should the pressure be on a 40 60 well tank?
A common pre-charge is 38 PSI when the pressure switch cuts in at 40 PSI and the tank manufacturer specifies 2 PSI below cut-in. Measure this air pressure with the tank fully drained and water pressure at zero. Some tank or low-pressure cut-out instructions call for a wider gap, so check the product documentation before adding or releasing air.
What is the 40 60 PSI pressure switch for a well pump?
A 40/60 pressure switch automatically starts the pump near 40 PSI and stops it near 60 PSI. It maintains water pressure by controlling pump cycles as the pressure tank fills and empties. The switch controls operating thresholds, but it does not increase pump horsepower, well yield, or pipe capacity.
What happens if the well pump cannot reach 60 PSI?
The pump may continue running because the switch never reaches its cut-out point. Possible causes include an undersized or worn pump, low well yield, a leak, low voltage, restricted piping, a clogged filter, or an incorrect setting. Turn off the system and request testing rather than tightening the switch further.
Can a bad pressure tank cause short cycling with a 40/60 switch?
Yes. A waterlogged tank, ruptured bladder, incorrect pre-charge, or undersized tank can cause the pump to start and stop too often. A leak, clogged sensing passage, or failing switch can create similar symptoms, so the tank and switch should be evaluated together.
Choose the Setting That Fits the Complete System
A 40/60 pressure range can provide steady household pressure when the pump, tank, switch, gauge, plumbing, and treatment equipment are properly matched. Before making an adjustment, confirm the tank pre-charge, check the gauge, and verify that the pump can reach cut-out without continuous running. Replace damaged components rather than using a higher setting to cover an unresolved problem.
Housatonic Valley Well Pump Services LLC provides pressure-switch, pressure-tank, and well-pump testing throughout its Connecticut service area. The owner-operated company has more than 20 years of hands-on experience, offers 24/7 emergency availability, and provides free quotes with upfront pricing. Call (203) 300-2148 or use the company’s contact page to request service.